
Table of Contents
A domain that doesn’t need to be renewed every year, and a hosting that is completely free. Technically speaking, you will have a free website.
Yes, you read it right. It is certainly possible with the buzzing Web3 technology.
You may have questions like is this technology useful today, can I buy an NFT domain now and create a website on blockchain, how much it will cost to create a website on the blockchain, will these Web 3.0 websites work, etc.
We had the same questions in our mind too. Therefore we did a bit of research, purchased an NFT domain and developed a Web3 website on the same.
To help you get the most out of the blockchain technology, we’ll discuss how to buy an NFT domain and create a Web 3.0 website in this article.
How to Buy an NFT Domain and Make a Web3 Website on Blockchain?
You need to first purchase an NFT domain to create a Web3 website. Follow the steps below to buy an NFT domain and create a Ai Web3 website.
Buying NFT Domain
-
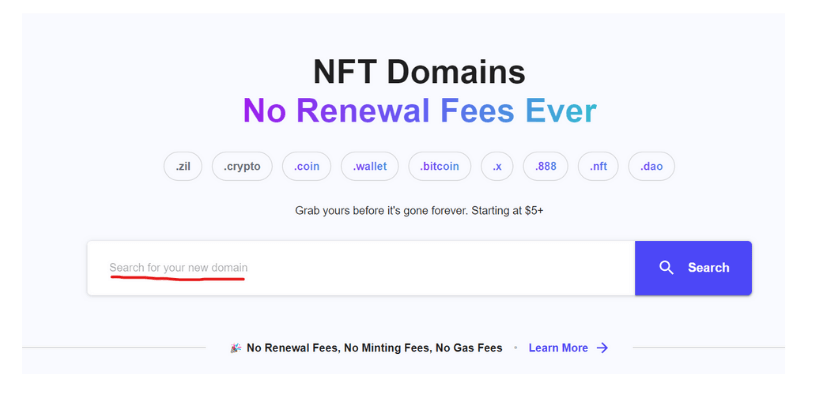
- Go to UnstoppableDomains.com (here you can purchase any of your desired NFT domains with ease)
-
- Search for your desired domain
- You will see multiple options such as .x, .crypto, .coin, .wallet, .bitcoin, .nft, etc. Select .nft from the available options
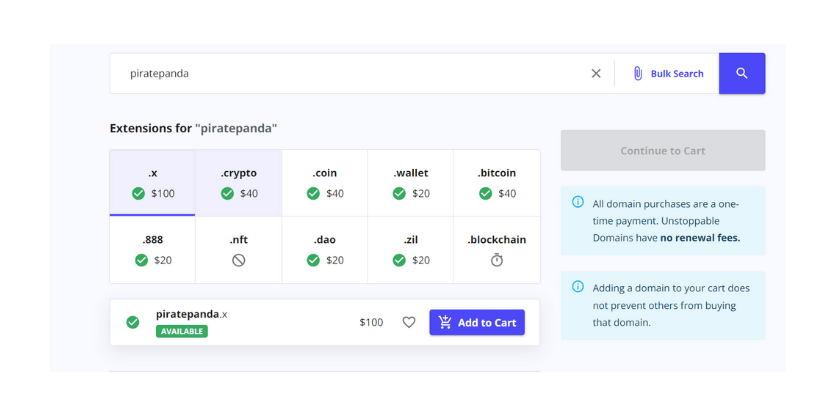
- Click on Add to Cart, then go on to Continue to Cart
- Signup with UnstoppableDomain.com, enter the payment details and purchase the domain
Minting and Creating Wallet
-
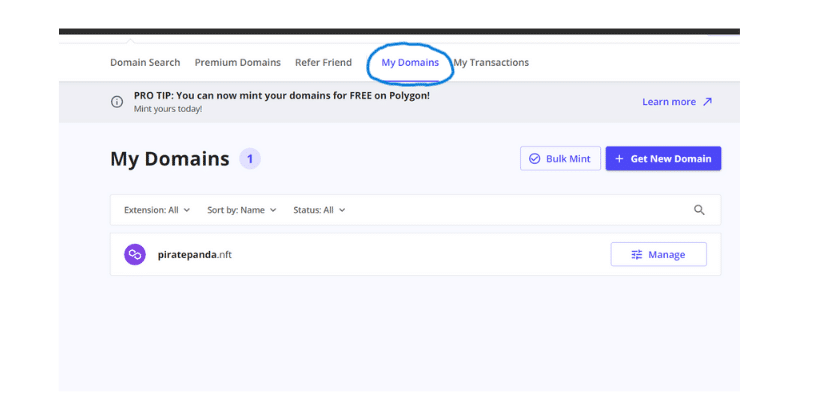
- Once purchased, you will see the option “Go to My Domain”, click on it
-
- You will see that your domain is not minted. Click on Free Mint to mint your .NFT domain (Minting is basically the process of registering .NFT domains on the blockchain technology)
- A popup “Mint Domain on Polygon” will appear. Click on Continue
- You will see multiple wallets. Choose your desired one and install the Wallet extension on your web browser
- Once the extension is added, you will need to create a new wallet. Click on Create New Wallet to continue
- Enter the username and click on Submit
- You will get a Secret Key, copy and save it. Tick mark the terms and condition checkbox and click on Continue
- Verify your Secret Key, then click on Submit
- Create a password, tick mark the terms and privacy policy checkbox and click on Submit
- You will see your wallet is ready
- Go back to UnstoppableDomains.com now. If the wallet is not connected, refresh the page and connect the wallet
- A popup “Two-Factor Authentication” will appear. Click on Send Verification Code
- Enter the verification code and click on Confirm to verify your email address
- You will see your wallet on the dashboard. Click on it to continue
- Tick mark the “I Understand” checkbox, and click on Confirm
- A popup “Two-Factor Authentication” will appear again. Click on Send Verification Code
- Enter the new verification code and click on Confirm to verify your email address
- You will see the minting process has started. Here, you won’t get the information about how much your .NFT domain has minted. Click on Track Progress to check
- Here you will see your domain name, mint domain ID, and minting start time
Creating Your Web 3.0 Website
-
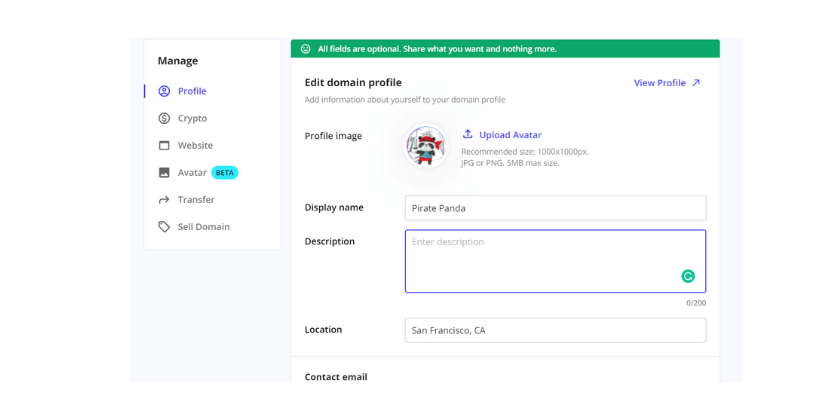
- Once your .NFT domain has been minted, click on Manage
- Here you will see multiple options like Profile, Crypto, Website, Verify, Avatar, Transfer, and Sell Domain. You can update them as per your needs
-
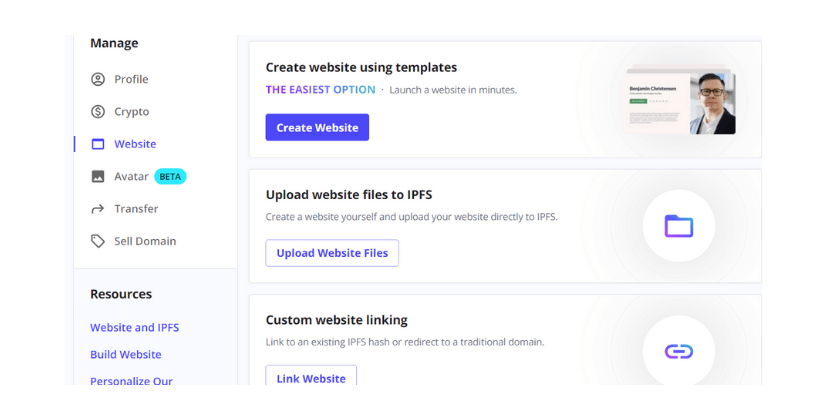
- Since we are creating a Web 3.0 website here, let’s ignore the rest. Click on Website to continue
- You will see multiple website options such as Create websites using templates, Upload website files to IPFS, and Custom website linking. Let’s first see what are the options to create a website from here. Click on Create Website
-
- You will be asked to Select Page Type. Here you have options like Personal, For Sale, Coming Soon, and Blog. Under personal option, you can create a Web3 website to tell more about yourself. The For Sale option allows you to create a Web 3.0 website for selling your domain. With Coming Soon, you can let your users know that your Web3 website is under construction. While the blog option is not available right now (till the article was written). For now, we will
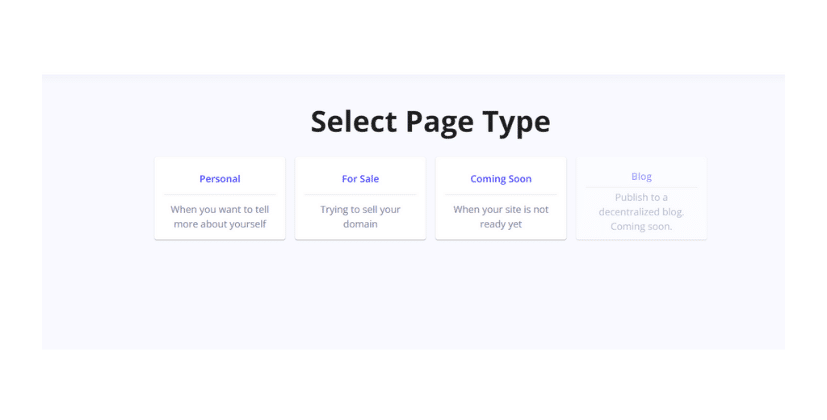
- select Personal option and see how you can create a landing page for your Web 3.0 website from here
- You will be asked to Select a Template. Choose the one you desire
- Once selected, you will see a simple landing page of your Web3 website for now. There is no option to add multiple pages till the article was written
- From the sidebar appearing on the right, you can change the look and feel, as well as the content of the landing page as you desire and make a personal Web 3.0 website in no time. Since there are not many options, so if you want, you can update the content in the templates and create your simple Web3 website
- Let’s go back to Website option under Manage and check out other options of creating a Web 3.0 website for the .NFT domain
- The second option is Upload website files to IPFS. If you already have a website, you can upload the website files to IPFS and make a Web3 website for your .NFT domain. Let’s see how it is done. Click on Upload Website Files to continue
- You will see that you have the option to upload website files like HTML, CSS, etc. only. Basically these are not servers right now, so you can’t expect to upload a WordPress website and run it. Plus you have a 20 MB files limit, so you can upload files like HTML and CSS for now as they are serverless and don’t require much space. Once you have uploaded files, click on Launch Website to make your Web3 website live
- Let’s check out the third and last option now Custom Website Linking. Since we don’t have the option to upload the entire WordPress website and launch it for now, we will check how we can link up our existing WordPress website through this option. Click on Link Website to continue
Exporting your WordPress Website
-
- We’ll export one of our WordPress page into HTML file for now and then try to upload and see it
- For this, you will be needing a plugin that lets you convert your WordPress page to HTML. Go to your WordPress dashboard, click on Plugins, and select Add New
- Here search for WP to Static. You will see multiple plugins, choose the one you desire. For instance, let’s install ReCorp’s plugin and activate it
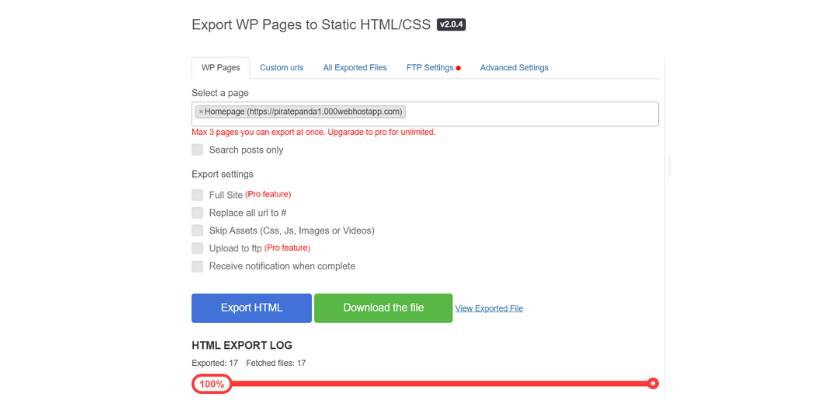
- Once the plugin is activated, go to the plugin, and select the page you want to convert to HTML. You will get the option to convert three pages at a time. However, here we will be only changing the homepage of our website and linking it to the .NFT domain. Add the page and click on Export HTML to continue
- It may take some time, but once done you will see the option to download and view the exported file. Click on Download the file to continue
Adding HTML file to IPFS Node and Uploading to Web 3.0 Website
-
- You now need to upload the HTML version of your website to IPFS node. For that, we’ll be using Pinata.Cloud since they are providing free service for now with 1GB storage
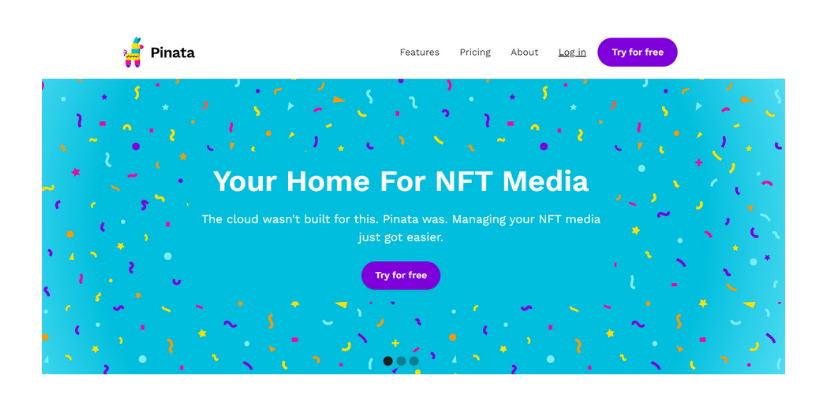 On Pinata.Cloud, click on Try for Free to continue
- You will see multiple pricing options. Choose the one you desire. However, we’ll be going with the free option for now. Click on Sign up now under Free plan
- Enter all the necessary information and click on Register
- Enter the verification code and click on Submit Code to continue
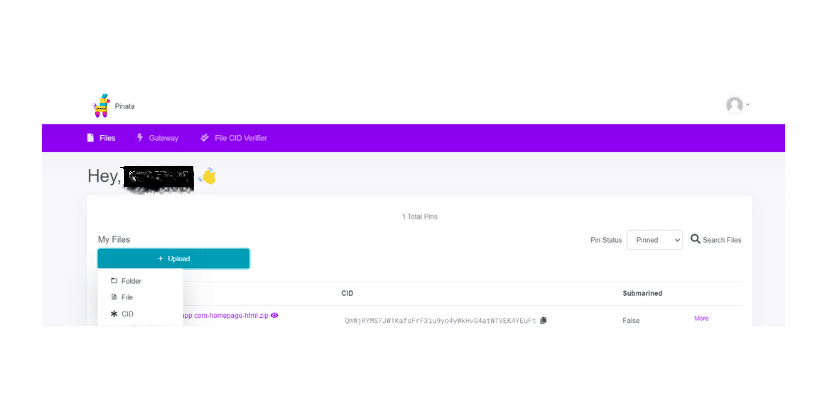
- You will be redirected to the dashboard. Here you need to upload your HTML files. Click on Upload, and select Folder from the dropdown menu. Since we have the complete folder, we’ll upload the same here. However, you can even upload the individual file too
- Select the Folder that you have downloaded, and click on Upload
- Give a name to your Folder and click on Upload. The files will start uploading and finish based on the file size
-
- Once the file is uploaded, you will see it on your dashboard
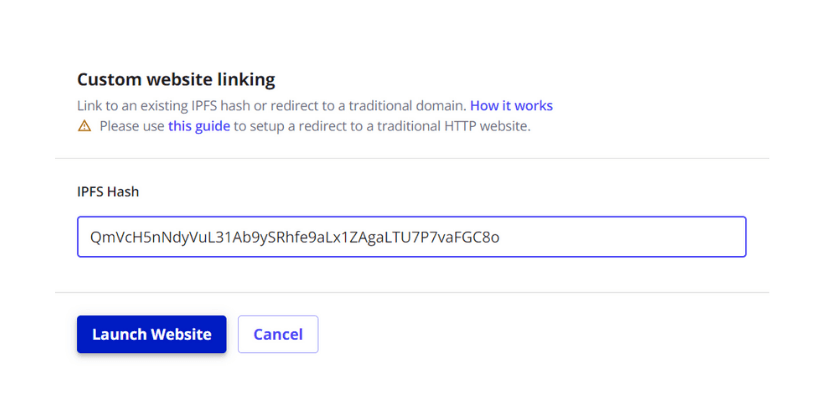
- Copy the CID, go back to UnstoppableDomains.com’s dashboard, and click on Link Website under Custom website linking. Paste the CID into IPFS Hash box, and click on Launch Website
-
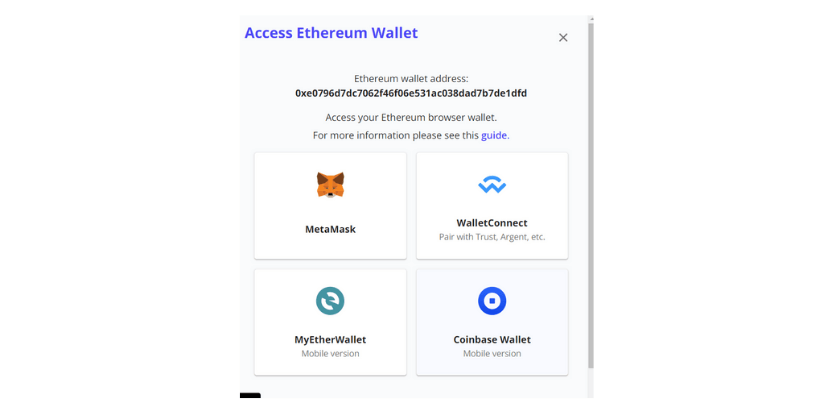
- You will need to give access to your Ethereum wallet again, like when we did it for minting the domain
- Select your wallet and sign the request to continue
- You will get a notification “Pending Changes”, and an option to Track Progress
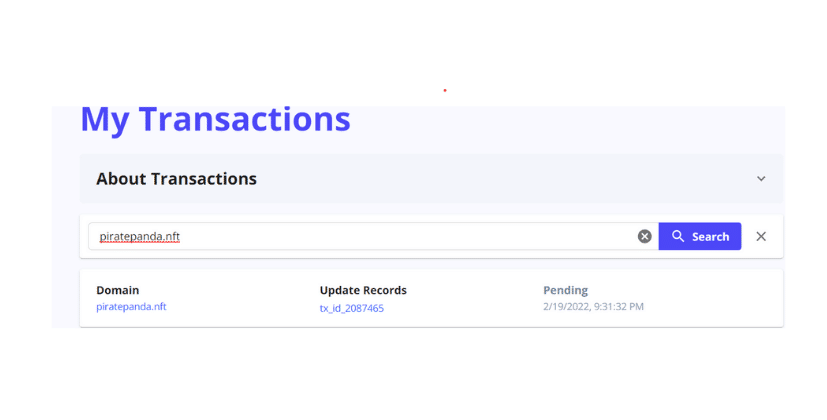
- You can see all the other website options have been blurred out, and only the Track Progress option is available. Click on Track Progress to check it out
- Here you can see all the processes. You can check when the domain was minted, what’s going on right now, etc.
- Once the process to connect the domain to the HTML version of your WordPress website is completed, you can see that your website is live under .NFT domain
How to see your website is live on .NFT Domain?
Since the normal web browsers don’t have the functionality to open .NFT domains yet, you will need UnstoppableDomains.com’s extension to see your Web3 website. Follow the steps below to view your Web 3.0 website on .NFT domain.
-
- Search for UnstoppableDomains.com’s extension
- Add it to your web browser
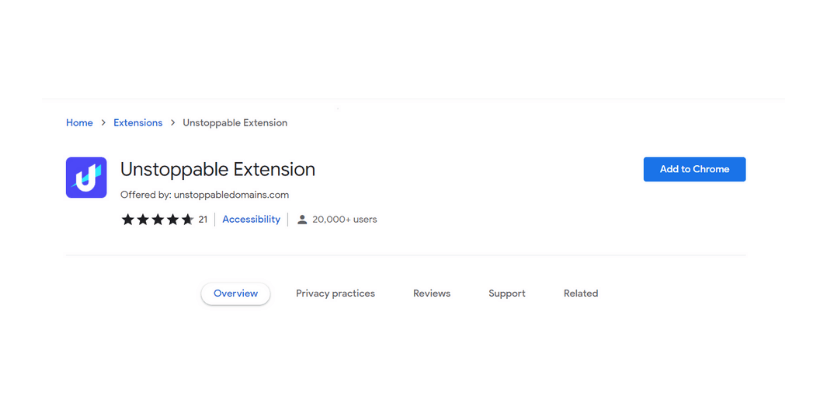
- Open your .NFT domain
- Voila! You are live with your Web3 website
This is how you can create a website on blockchain technology for now. Listed here are some of the benefits of creating a Web 3.0 website for .NFT domains.
- Easy to buy and setup
- File storage and hostage is free
- Website works flawlessly; and
- Can be used to host HTML and CSS based web pages only
By following the above procedure, you can easily create a Web3 website on the blockchain technology and host it on .NFT domains. However, there are still a few limitations that will hinder you from taking the advantage of this evolving technology for now.
But, nobody knows the future. As soon as mainstream browsers like Google Chrome, will start supporting these .NFT domains, you will definitely be seeing a great rise in Web 3.0 websites on .NFT domains.
Take a deeper dive into the digital ecosystem and start expanding your business with these helpful resources:
How to Calculate Tax on Cryptocurrency in India [Cryptocurrency Tax India]